17 July 2011

Chocolate & Mint buttercream cupcakes


Until few months ago I thought the idea of combining mint and chocolate together was horrible...let alone eating it. This until we took the girls to Avery Hill Park where a small Cafe by the playground does huge ice cream scoops and I braved myself into giving it one more try. Well don't know what it was, but something just clicked...the flavours were a match made in heaven! I ate that chocolate&mint ice cream hoping it would never finish! Of course it was my turn now trying to mix the two flavours together...so here you go a lovely chocolate and mint cupcake!
Although I am converted to chocolate & mint there is still something that I can't stomach...chocolate and orange. I mean seriously? that just doesn't go together!  I doubt I'll ever change my mind on this...although that is what I used to say about the chocolate-mint match. Well I guess we shall wait and see :) 


What I loved about these chocolate cupcakes was the intense chocolate flavour. The cake stays moist even after 24 hours and it is not too sweet so there is no risk of being too sickly. Because the chocolate flavour is so intense a light buttercream is the perfect frosting. I love how the mint tingles all my taste buds, then the chocolate comes, invades and mesh with it :)


Chocolate & Mint buttercream cupcakes
Makes 12 cupcakes

Ingredients:

3/4 cup all-purpose flour
3/4 cup sugar
1 teaspoon baking powder
1/2 teaspoon baking soda
1/4 teaspoon salt
7 1/2 tablespoons unsweetened cocoa powder
3 tablespoons unsalted butter, melted
7 tablespoons buttermilk
1 large egg
1 large egg white

Directions:
Preheat oven to 175 C. Line 12-cup muffin tin with paper liners.
In a large mixing bowl, combine all the dry ingredients: flour, sugar, baking powder, baking soda, and salt and set aside.

In another bowl combine the cocoa and 5 tablespoons hot water until a thick paste is formed(this process should intensify the chocolate flavor).
Once you have the chocolate paste add the butter, buttermilk, egg, and egg white and beat until combined. Whisk in the flour mixture one spoonful at a time.

Scoop the batter into the prepared cases, and bake for about 15-17 minutes until cooked or until a toothpick inserted in the center of a cupcake comes out clean.

When ready take them out of the oven and transfer the cupcakes to a wire rack to cool completely. Decorate as you like. I have dusted some cocoa powder and made some sugar paste leaves.

Source: adapted from honey & jam, originally adapted from Martha Stewart

10 July 2011

Rock Salt Double Chocolate Cookies


The original recipe is a giant double chocolate cookie, I mean with each cookie supposed to be about 115gr. but I wasn't brave enough and I ended up making "normal" size cookies. When I say I wasn't brave enough I really mean that if I would have made them that big I would have eaten the entire cookie all at once no problem..so to avoid that, I just tricked my mind by eating 3 smaller ones and telling myself that I don't need to feel guilty since I could have been naughtier and eat huge one!
The thing I most love about these cookie ( and I know some people will hate it, I think is one of those LOVE it or HATE it thing) are the chuncks of rock salt. It's an explotion of flavours, the little chunck of salt that sits at the back of your throat and meets with the strong and rich flavour of the chocolate is just divine. So if you do make them and you are braver than me and make the full size, let me know if you are in the team LOVE (like me) or HATE!
Looking forward to hear...:)


Double Chocolate Cookies

Ingredients:
Makes abot 24 regular size cookies or 12 giant cookies

1 cup cold, unsalted butter
1¼ cup white sugar
2 large eggs
½ cup cocoa powder
2¼ cups plain or all-purpose flour
¼ tsp. rock salt
1 tsp. baking powder
2½ cups dark chocolate chips or any type you like.

Directions:
Preheat the oven to 175˚ C.
Line baking sheets with parchment paper .
In a medium bowl mix the cold butter and the sugar with an electric mixer until light and fluffy . Add the eggs one at a time and mix after each one is well combined. Mix in the cocoa powder until well blended. To finish add the flour, rock salt and baking powder, mix for about 1 minute, then add the chocolate chips and fold them in with a spoon or spatula.
By now the dough should look well combined and mixed. Start by taking small amount of dough (about the size of a big walnut) and roll into a ball and flatten just slightly into a disc. Place on the baking sheet and cook for about 8-10 minutes. When ready let them cool on the baking sheet for few minutes and then remove them and place them on a wire rack to cool.
Enjoy!

Source: adapted from Annies Eats who adapted it from  My Baking Addiction, originally inspired by Levain Bakery

20 June 2011

Summery Salmon with Coriander pesto


Summer is almost here!! Oh well, it should be here except where we are, as the temperature keeps dropping down instead of going up. It started to get to me, I mean I was born in a country were the sun shines even when it is cold and winter. So what's better than cooking a nice summery dish to uplift ones spirit? This salmon dish was lovely and the pesto so refreshing. It was the first time Gloria was going to try salmon, so I made sure it was luscious enough to get her little taste buds tingle..and it worked! She liked it! We enjoyed it with a nice salad and some bread. It didn't make the sun shine and come out, but it definitely made us feel warm, happy and satisfied.


Summery Salmon with Coriander pesto
makes: 2-4 salmon fillets (depending from size)

Ingredients:
1 clove garlic
1 cup coriander
2 tbsp. extra-virgin olive oil
2 tbsp. lime juice
2 tomatoes, seeded and chopped
salt to taste

Directions:
Preheat oven to 180.
In a food processor or blender add the garlic (slightly chopped), coriander olive oil, lime juice and salt (just a pinch to start with). Blend for few minutes until you have a creamy pesto (taste it and add more salt if needed).
Put some tin foil on a baking dish and place salmon fillets. Spread the cilantro pesto on salmon fillet and top with the chopped tomatoes. Bake for about 15 minutes.

Source: adapted from Annie's eats

19 June 2011

Biscotti al latte


I made these biscuits twice and both times the husband and the little girl have devoured them! I made them in different shapes as well just because it is fun to change :) These biscuits are made with milk, they are perfect for dunking and you could keep eating them almost guilt free. I mean they still have butter and eggs and sugar, but somehow the fact that they contain milk and taste so light almost take the guilt away ;)
I loved eating them in the winter, on a snowy day, sitting with Gloria drinking hot chocolate while sitting on the couch with a comfy soft blanket...but i also loved them on a spring day with some cold milk while looking out of our window at the trees. :)
These biscotti al latte (milk biscuits) remind me of my adolescence. When I was little my mum would tell me that these were the healthier option to those chocolaty fatty ones...and this is what I started telling my little one. However I not as disciplined or strict as my mum was...because as soon as I have some spare time here I am trying a new recipe of those "fatty" biscuits and I can't wait to hear Gloria's thoughts on them..and I'm pretty sure she doesn't mind either :)


Biscotti al latte:


Ingredients:
500 gr flour
100 gr. butter
150gr. sugar
100gr. milk
1/2 tablespoon runny honey
pinch of salt
1/2 teaspoon vanilla essence
1 pack of vanilla yeast or 1 tablespoon of baking powder (I never used the baking powder but it should work)


Directions:
Preheat the oven to 180˚C. Combine all the ingredients together until you have a smooth and well combined dough. Roll the dough out on a well floured work surface to about 1 1/2 cm thick. Cut the dough into rectangles about the length of your fingers and give them a round shape (see 1st picture above) or just cut them in any shape you like. Whatever you choose don't make them too flat.
Brush them with some milk and cook in oven for about 8-10 minutes.
When cooked remove them from the oven and place on a cooling rack. When completely cooled placed them on a serving plate and sprinkle with some powdered sugar.
Enjoy the dunking! :)

Source: adapted from www.ildolcemondodisara.com originally from anna-moroni.

16 June 2011

Birthday Cake.... like mummy used to make it


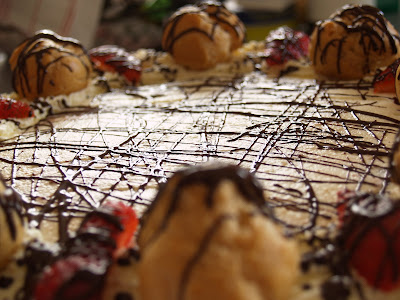
Oh how I loved the days before my birthday. I would go with my mum to get the ingredients to make my birthday cake and we would discuss about the decoration to make on top of it. The cake was always the same usually. Sponge cake (pan di Spagna) and either a chocolate or vanilla or lemon cream filling and whipped cream to decorate on the outside. But then the fun would start, we would think different things to put on top and how to make it beautiful. I remember that strawberries or chocolate was often my choice. I remember that no matter how busy she was, my mum would make a cake for my or my siblings birthday. She used to say that it's not a birthday if there isn't a birthday cake! and she did so till I left home and moved to a different country.
Here is my last birthday cake (yes, I make my own birthday cake and I love it!)


Ingredients:
Pan di Spagna (Sponge cake):
for a 9 inch tin or 23 cm.


6 Eggs
3 Tablespoons water
300 gr. sugar
300 gr. flour
1 sachet of vanilla yeast ( 16gr.) or it should work with 1 Tablespoon of baking powder (though I have never done it with the baking powder.)


Syrup
Equal amount of water and sugar
or add some alcohol


Crema pasticcera (Cream filling)


250gr milk
2 egg yolk
75 gr. sugar
1/2 to 1 Tablespoon flour
1/2 lemon zest omit and substitute with about 2 tablespoon of cocoa powder


Frosting


500 gr.Fresh double cream
Sugar


Directions:
Beat the egg whites until stiff, add the egg yolk, water and the sugar and mix together till combined. Add the flour few spoonful at a time while still mixing. when is all well combined add the vanilla yeast. Transfer it in a cake tin and bake in oven for 35-40 minutes at 185, or until a toothpick (or spaghetto) inserted comes out clean.


When the cake is ready, take it out of the oven and let it cool. While you wait for it to cool completely prepare the syrup. I use a small saucepan and just heat to the point of boiling equal amount of water and sugar until melted*. When the cake is cool to the touch cut in the middle ( I only made 1 layer, you may cut into more layers) and wet the sponge with the syrup using a brush.


For the cream filling: Beat the egg yolks and the sugar together, add the milk and transfer it in a sauce pan and place it on the hob at very low heat. (if doing a lemon version add some lemon peal to the mixture and remove when cooled)While whisking add the flour (and cocoa powder) slowly with a sieve, keep whisking until the mixture becomes a cream. Remove from heat and let it cool before spreading onto the cake. Do as many layers as you like.


For the cream frosting: just whip some cream with some sugar (it depends how sweet you want it) and decorate as you like :) I put some cut up strawberries and filled up some profiteroles with the same cream that is in the cake.


*However I think the water-sugar combination is a bit boring so I usually put less water and a bit of alcohol. In this cake I used some limoncello liqueur (cherry liqueur, martini, Marsala wine are all good options). Don't worry about feeding it to the kids, because most of the alcohol will evaporate while heating it.


Source: Own recipe as it was passed on to me by my mother who probably got it from her mother!